Measuring Up for Organised Storage
When the aim of the game is to make the most of your space, somewhere along the lines there’s going to be some very detailed designing. The ultimate design will leave no gaps between the stored items, and yet everything will still be within reach. This all hinges on accurately measuring the available space, its limitations, the objects to be stored and understanding how they’re used.
This is a very time-consuming process, but the time invested once, is returned for my clients exponentially in floorspace saved and lifetime organisational bliss. When designing storage, everything is personal, and paying attention to this very “dry” aspect of design is what makes the client’s heart sing when their cabinetry is finally installed and apart from looking gorgeous, they have a safe and accessible place for Grandma’s vase, their kid’s artwork and perhaps a concealed kitty litter tray.
It’s common for services to be concealed within existing cabinets. Look carefully so that you don’t miss them and mark exactly where they are so the new cabinet can be designed neatly around them.
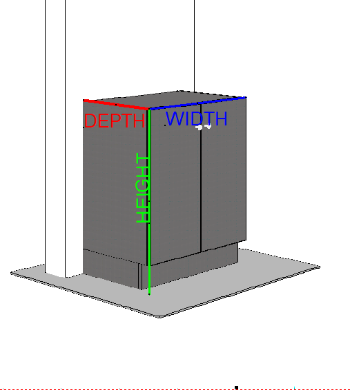
In this cabinet there is an electrical appliance sitting on the back wall in the middle of the shelf, it is attached to conduit that runs to the right and then up to the ceiling. You’ll see it represented below in the 3D render of the upper cabinet.

Here’s what I need to find out:
1. The size of the room
2. Obstructions, or site limitations
3. What is going to be stored
4. Logical groupings for the stored items (e.g. ladder and brooms together, or iron near ironing board, her clothes left, his clothes right)
5. How high the relevant people can reach
6. Measurements of furniture that will remain in the room, like beds, sofas desks and pianos
Here’s how I Measure the Space
Firstly, which is which in dimensions?
Step 1 – Measure the room
Floor Plan – The floor plan shows the shape of the room and its contents in 2D as if looking down on the room from just under the ceiling.
Measure and draw each of the following:
1. Walls, doors, door swings and windows
2. Obstructions – anything that protrudes from walls like wall lights, window furnishings and power points, air conditioning ducts, fans and manholes
3. Label adjoining rooms. This is sometimes useful in the design stage, when the relationship between adjoining spaces could have a positive or negative effect on each other, e.g. saving space in a walk-in -wardrobe so that an ensuite can fit
4. Mark where power points and switches positions if this is relevant to the design, e.g. the switch might be covered by new joinery so require relocation, or power point would be useful close to electrical equipment
5. Mark the ceiling height in the top right corner of the floor plan
6. Either give the plan an orientation with a “North” point, or label the walls with numbers which can then be represented in the Elevation views
7. Dimension the drawing to show the overall wall length and other features already mentioned
Note: Window and door dimensions should include the architraves, so that any new construction will fit up to or clear of these.

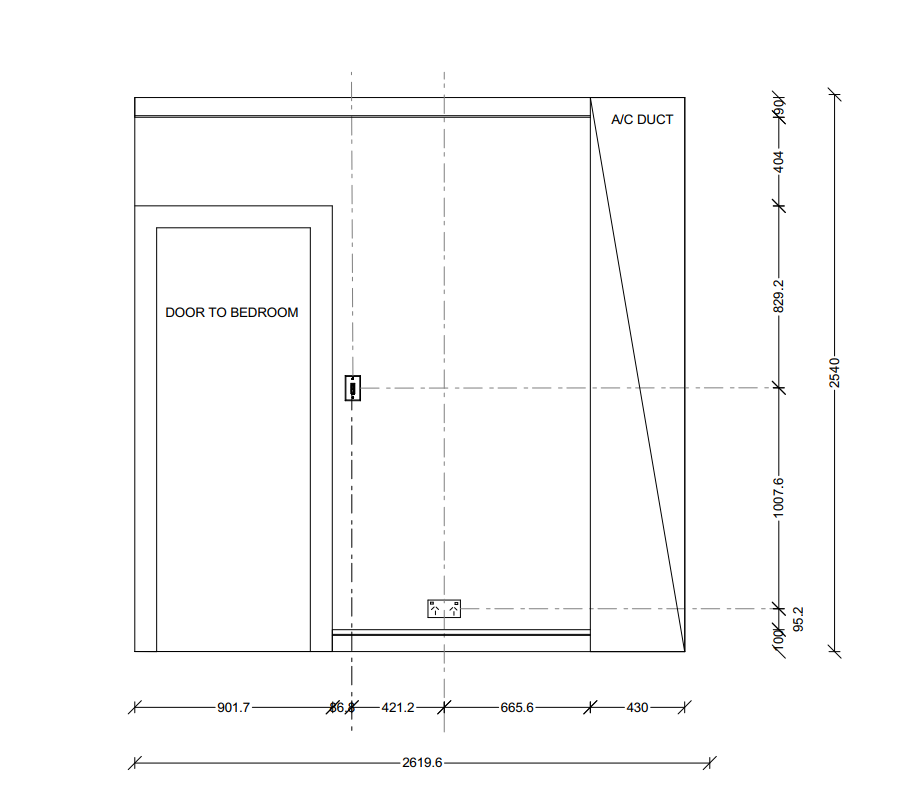
Elevations
1. Elevations show the shape of each wall and its fixtures as if looking directly at it face on
2. Mark in anything that’s on the wall like windows, doors, switches, other obstructions
3. Dimension wall length, height, and obstructions
4. Label the wall to correspond to the floor plan
5. Either draw or just record on the plans somewhere the heights of:
A. Skirting
B. Cornice
C. Doors
D. Picture rails
Observe and note anything that could limit your design or reduce functionality such as:
Damp
Mould
Poor access (e.g. narrow lift or stairwell)
Body corporate requirements
Unsound wall
Heritage Building restrictions
Discuss the issue with the client to give them the opportunity to resolve the problem before building new furniture.
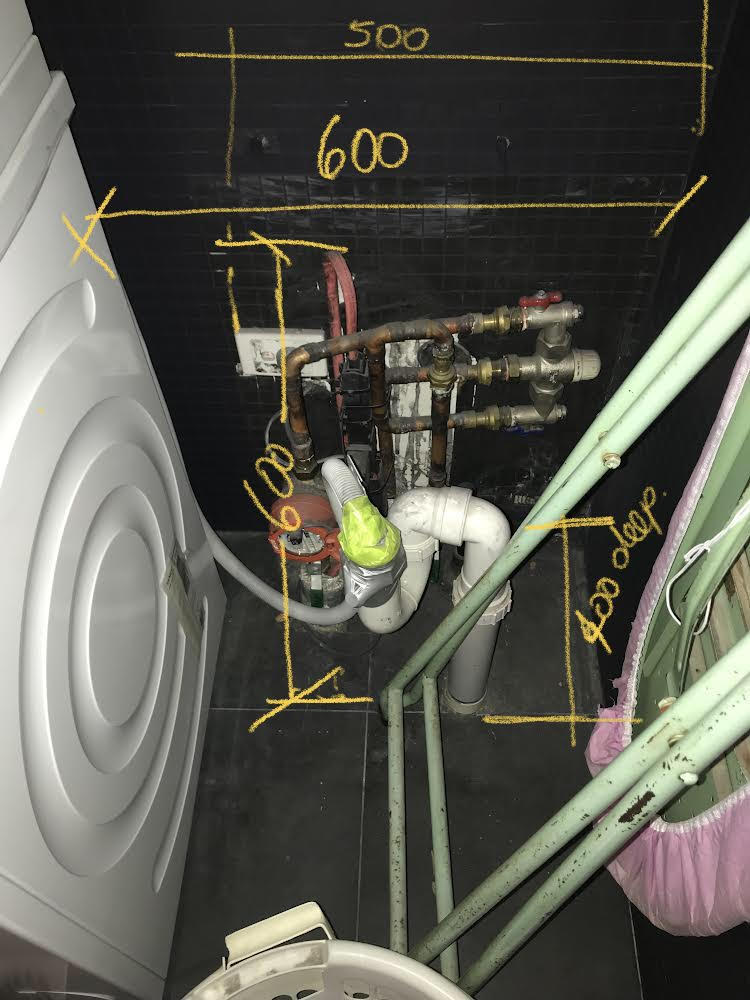
Note – Services like these will require a solution that ensures access is retained
*TIP – Search for bonuses
Remember to look for “borrow and payback” opportunities between adjoining rooms whereby “sharing walls”, in the new design could benefit both rooms.

When designing the walk-in wardrobe in this small bedroom, by carefully arranging the clothing layout on the rear side of the wall, I created a bonus niche on the bedroom side.
The shallow niche sits just above dresses which for this client only need 1350mm of height. The effect makes the bedroom feel more interesting and larger. If I hadn’t measured her dresses, I wouldn’t have been able to enhance the bedroom in this way.

Step 2 – Find out what needs to be stored then measure it.
There’s no single approach to this because each project is different. You just need to think about the objective then decide what needs to be measured to get the most space efficient, ergonomic design.
If you don’t know where to start, look for logical groupings that either already exist or that make sense based on the required functionality.
For example, when designing a home office, you wouldn’t count individual books, but you could measure the shelf they’re on or box they’re in and measure the average height, then do a rough calculation that 5 shelves x 900mm wide, x 350mm deep at 250mm apart are required, (that’s easier than it sounds, see photo below).
You could note that 1 metre of them need to be within reach of the desk and the remainder could be stored further from the desk.

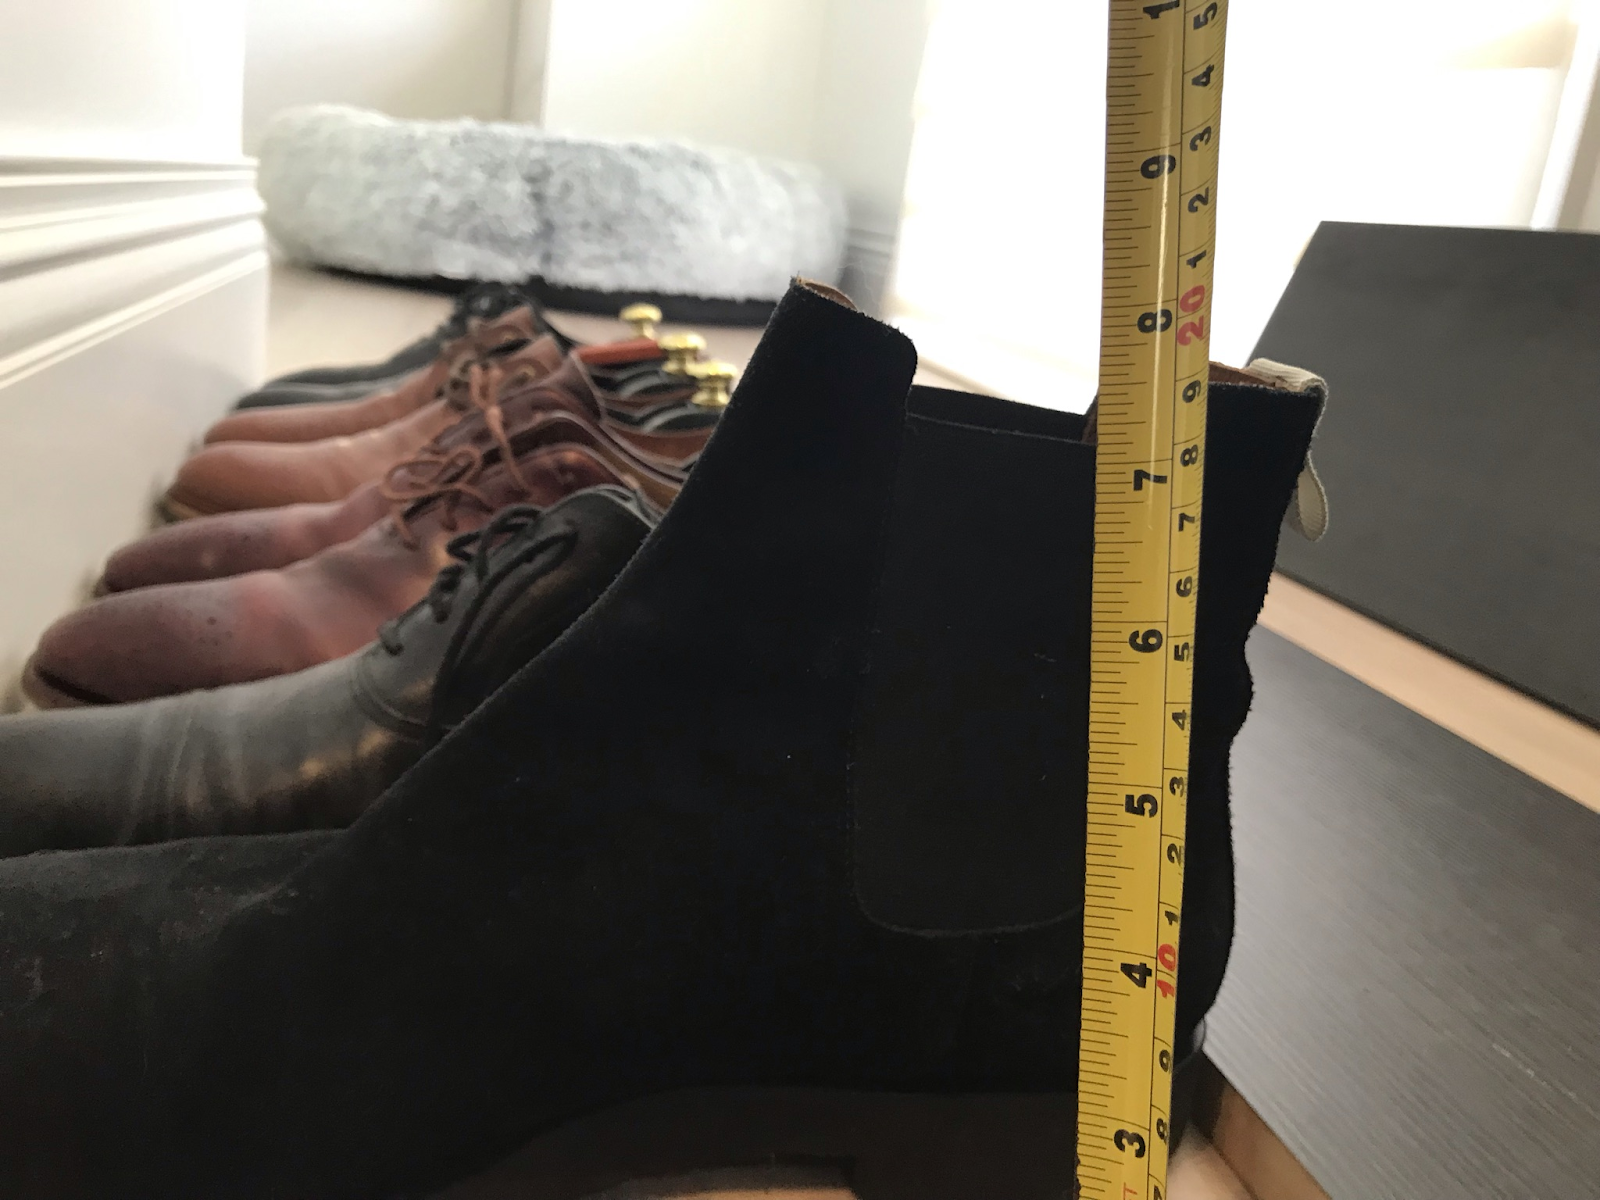
In a wardrobe, I measure her things as a group and his as a separate group unless they are willing to completely share the entire space. Then measure the various length groups of hanging space so that storage is maximised around the differing clothing lengths.

Practical Tip – use photo editing software to document the sizes of objects.
Measure Fixed Items including:
Appliances
Furniture that is to remain in the space
Minimum functional requirements e.g., minimum length, height, and depth of workspaces, clearance for trolleys, wheelchairs and moving parts
Obstructions like ductwork, pipework etc
Measure Loose Items
Measure all functional objects and the space they need for operation e.g. printers plus clearance for loading paper.
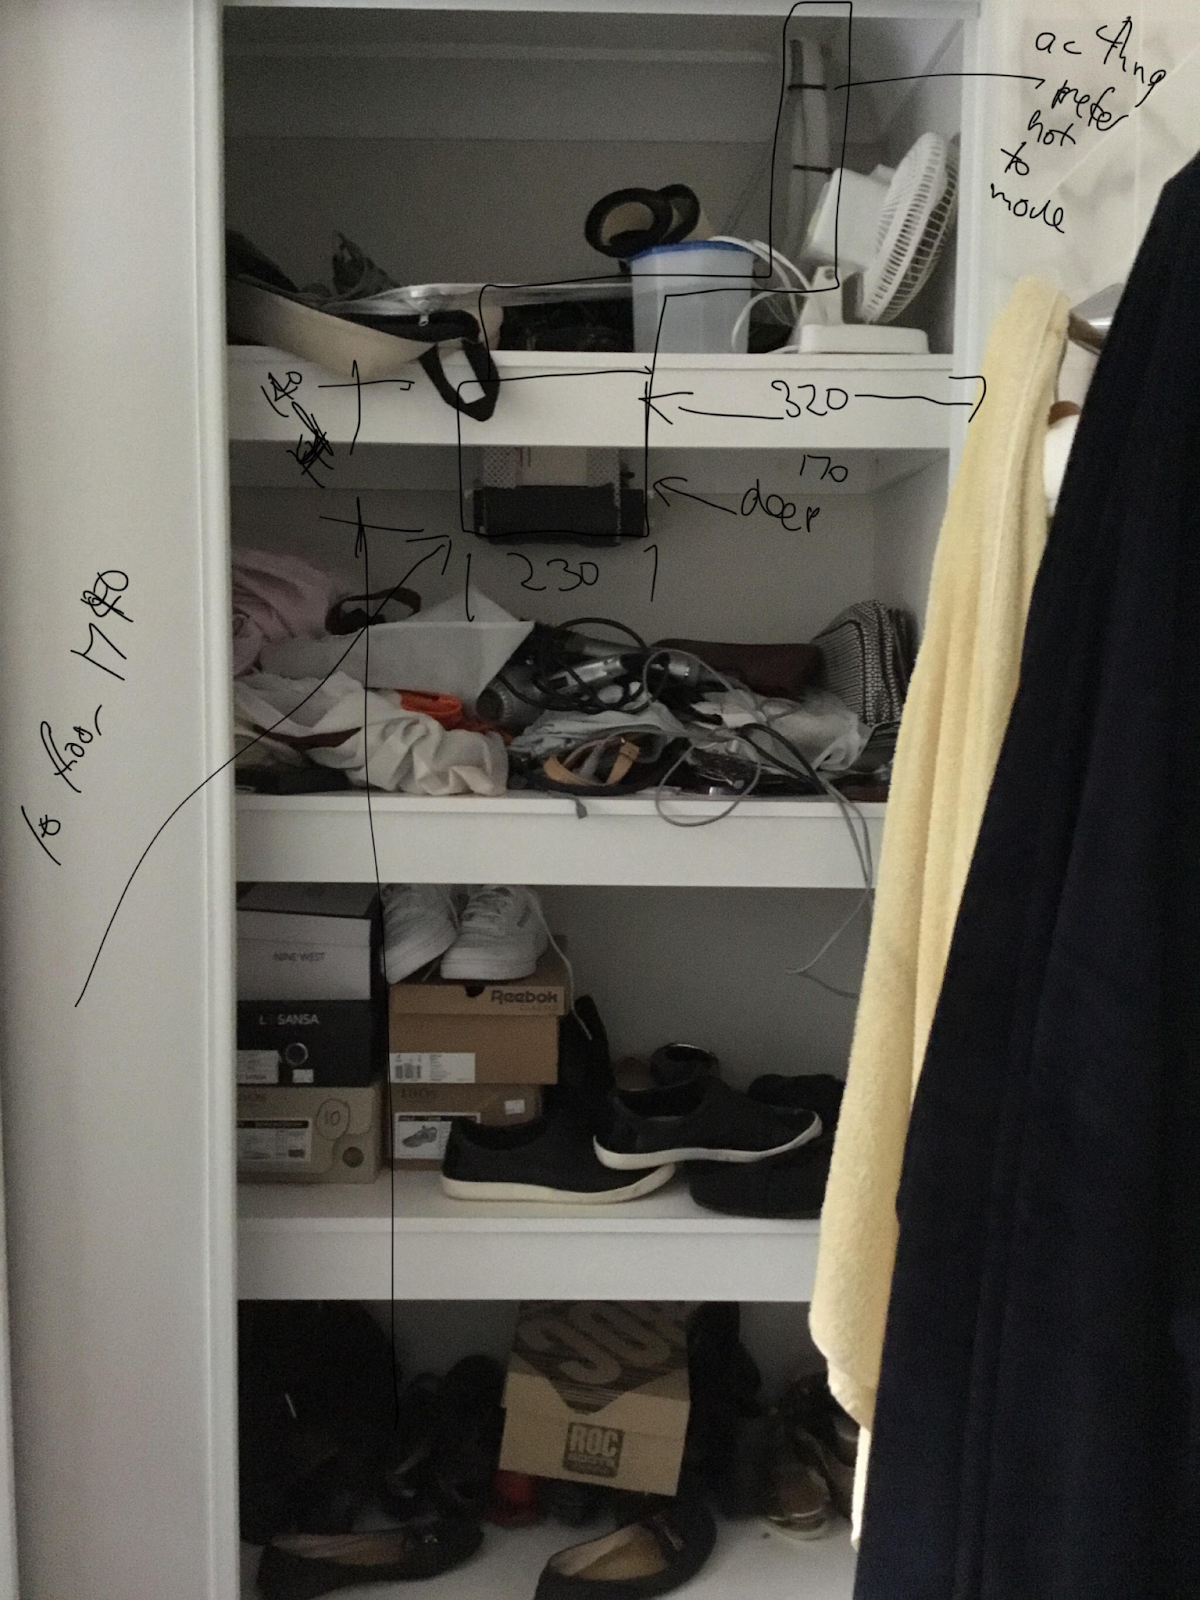
Note the current lineal space consumed so that I can compare between the new design and the current situation e.g. total lineal hanging in a wardrobe, or total bench and shelf space in a laundry, or the total number of file drawers and desk space in a home office. This way, a client will know how much more storage they have compared to the current situation so they can evaluate which design concept suits them best.

Here you can see how I measure and record the current clothing quantities and indicate how much more is ideally needed.
Record the reach height of the shortest person involved so they can get whatever they need, unassisted.

How do these people live?
Record how the people use their things e.g. they like to iron in the living room, or they would prefer gym bags to be kept in the laundry. One person likes to keep their belts rolled and the other chucks them into a drawer.
Make a note of the following for applicable cabinetry:
Preferred height for:
TV’s
Dressing tables
Ironing boards
Desks
Bedside Tables
Handles
Overhead cabinets
Practical Tip Allow space for cables between the appliance and the wall so that your appliance fits within the cabinet and cable space is accommodated.
